|
|
| How to setup an Autoresponder |
|
An autoresponder lets you send an email to your subscribers a specific number of hours or days after they have subscribed to your mailing list. For example, if John signs up to your mailing list today, you can create an autoresponder to automatically send a welcome email to him 24 hours after he subscribes.
Autoresponders are often called the "marketer's dream tool", and in this article I'll show you how to setup a basic autoresponder to send an email to your subscribers 24 hours after they join your mailing list. To create an autoresponder, start by moving your mouse over the "Autoresponders" tab and clicking the "Create Autoresponder" menu option, like so: 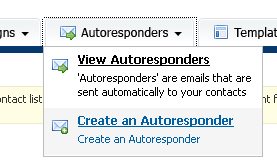
To create an autoresponder, click the "Create Autoresponder" option under the "Autoresponders" tab. The "Create Autoresponder" page will appear. Choose the mailing list you want to create the autoresponder for and click the "Next >>" button. Complete the autoresponder details form. The only required field is a name for your autoresponder, which is used to identify the autoresponder in the control panel. This name is not shown to your users. You can optionally filter the email addresses in your subscriber list using the other options on the form, but for our example we will send to everyone on the list. Click the "Next >>" button when you are done. 
The only required field is the autoresponder's name field. All other fields are for filtering the subscriber list, so we can skip those for now. When the page loads, complete the form. Pay particular attention to the "Bounce Email" and "Hours Delayed" fields. The "bounce email" field is the email address where emails rejected by your subscribers mail servers will be sent. The "hours delayed" field tells the scheduling system how many hours after someone subscribes to your mailing list to send them the autoresponder email. "0" means it will be sent straight away. Optionally, complete the rest of the form. If you're unsure about any of the options just move your mouse over the help tip to learn more. Click the "Next >>" button to continue. On this page you can create the content for your autoresponder email. Enter a subject in the subject field. This is the email subject line your subscribers will see in their inbox. Enter the content of your newsletter in the editor too. Use the "Send Preview" option at the bottom of the page to send yourself a preview of the email before clicking the "Save And Exit" button. Congratulations, you've just created your first autoresponder! Remember, you can create as many autoresponders for each mailing list as you like, so why not get creative and use autoresponders to your advantage? Bonus section: Ideas for autoresponders So how might you use an autoresponder in your business? Here's a simple idea that's quick and easy to implement. In this example let's assume you sell poker chips online from your eCommerce website.
|